Are you the type that starts Christmas projects in July? Then I have a fun card for you!
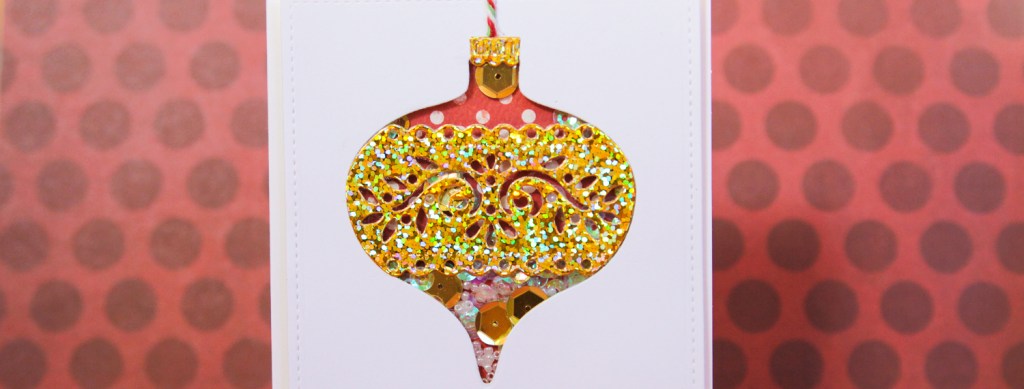
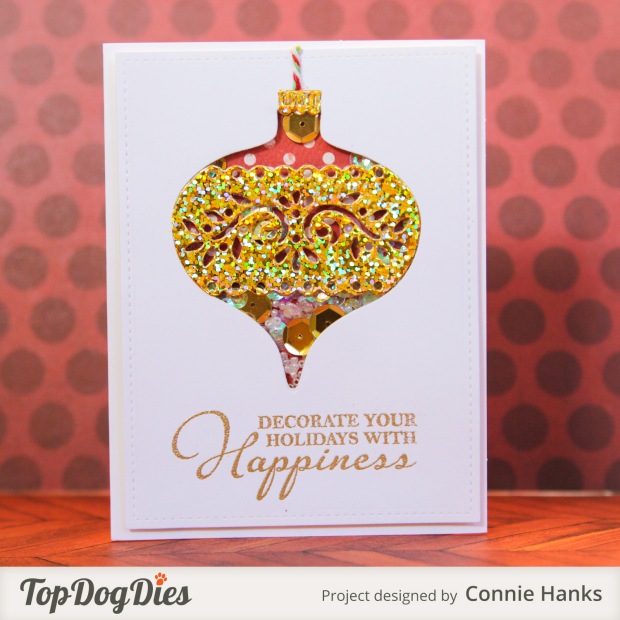
 Welcome to another Make It Monday! It’s the last Monday in July, so I wanted to share another Christmas project 🙂 I couldn’t resist making another shaker card – with the goodies inside the ornament, no less!
This adorable die is from Top Dog Dies, and lucky for you, they’re having a Christmas in July sale! Use code CIJ2015 through July 28th and save 10% off all Christmas and Winter items! I used the Top Dog Dies Ornament & Tags #1 Die Set, but there are tons of goodies you must check out!
I tend to shy away from making too intricate of cards during the holidays, especially when I’m making lots as in Christmas cards, so I wanted to make a really fast and easy project! The die set has several layers and I was able to whizz-bang through the cuts in no time. I think this card took about 10 -15 minutes to make. And who wouldn’t love to receive a fun shaker card during the holidays?!

The additional pieces are stunning, like this intricate layering piece. So gorgeous!
1. Cut the accent pieces from gold paper.
2. Cut a white piece of cardstock into a 4″ x 5-1/4″ rectangle to fit inside a standard A2 card (4-1/4″ x 5-1/2″).
3. Cut the ornament form the rectangle piece, being sure to leave a border all around the edges.
4. Cut a piece of foam slightly smaller than the rectangle, then cut a hole slightly bigger than the ornament size so the foam would not show through the hole.
5. Glued piece of acetate to back of rectangle card stock.
6. Glued ornament details (intricate center strip and ornament clasp) onto front of rectangle card stock.
7. Glued foam piece to back of rectangle card stock piece, being sure none of the foam showed through.
8. Added holiday color piece of paper onto front of card to show through the acetate/ornament.
9. Filled center area of shaker card with sequins and beads.
10. Securely / firmly glued rectangle piece onto card base. Voila! Shaker card!
Hope you’re inspired to make a shaker card of your own! I actually just shared a Palm Tree shaker card I made on my YouTube channel. It’s using the same idea as the Christmas ornament shaker card, except using the Palm Tree Dies, also from Top Dog Dies! If the written instructions didn’t make sense up above, hopefully this visual will help! And if you don’t have foam sheets, you can always use foam tape to create your own spacing for the shaker, just make sure you have a nice even layer!
I hope you enjoyed that and are ready to continue the Make It Monday circle! Be sure to hop on over to see what Karen at Photos Kept Alive is up to these days. I’ll give you a hint: it includes an upcoming trip and camera choices… definitely has me curious! We all struggle with that question on so many occasions…my camera phone or my big camera. Hop on over to see what Karen has to say!
As always, thanks for stopping by my little colorful spot on the web! Have a joyful, creative, blessing filled day!
Live creatively!
xoxo,
/c
PS. Love all that sparkles and shines? Me too! And apparently SimonSimon Says Stamp Wednesday Challenge is feeling the vibe too as the theme this week is Sparkle and Shine – I love when that happens! Check out the inspiration over there too!
P R O D U C T S U S E D // AFFILIATE LINKS


3 responses to “Make It Monday // Top Dog Dies Christmas Shaker Card”
Hey… I nominated you in this tag 🙂 https://kimomolab.wordpress.com/2015/07/28/tag-staffetta-del-cinema-the-baton-of-the-cinema/ if U want… 😉 thanks
LikeLike
The card is so festive it reminds me of Diwali, a festival we celebrate in India! 🙂
LikeLike
Hi im new on WordPress and you were the first blog i saw i love this idea and will definately give it a try . x
LikeLike