

I do this every holiday. I have big dreams of making tons of items – decor, cards, tags – and time just completely sneaks away from me. Luckily, this time, I got my cards in the mail, just in time!
My girls have been sick and I’ve been feeling a tad rundown, so we all just stayed home today. No school. No gym. No errands. Jammies all day – woohoo!
In the MOMs (Ministry of Mother’s) group I belong to at church, we had a wonderful marriage therapist come talk to our group last week, and her topic was building forts (or a safe haven) for our marriages. This made me realize that my girls had never built a fort! Sure, we’ve built plenty of clubhouses, even a pretty fancy one in our backyard, but never an old fashioned fort with chairs and a sheet. So we started our morning with a yummy breakfast, then got busy building a fort. I knew they’d love it, but I had no idea that meant I’d actually have the morning to think! Yes, just think about my day, rather than trying to keep up with the chaos.
With my thinking time, I figured I needed to get started on Valentine’s cards for the grands and sibs. I immediately went to check out Kristina Werner videos – she always inspires me! I took a little of this, a little of that and came up with the card above.
Besides patterned cardstock, solid cardstock and adhesives, here’s what I used to make the card:
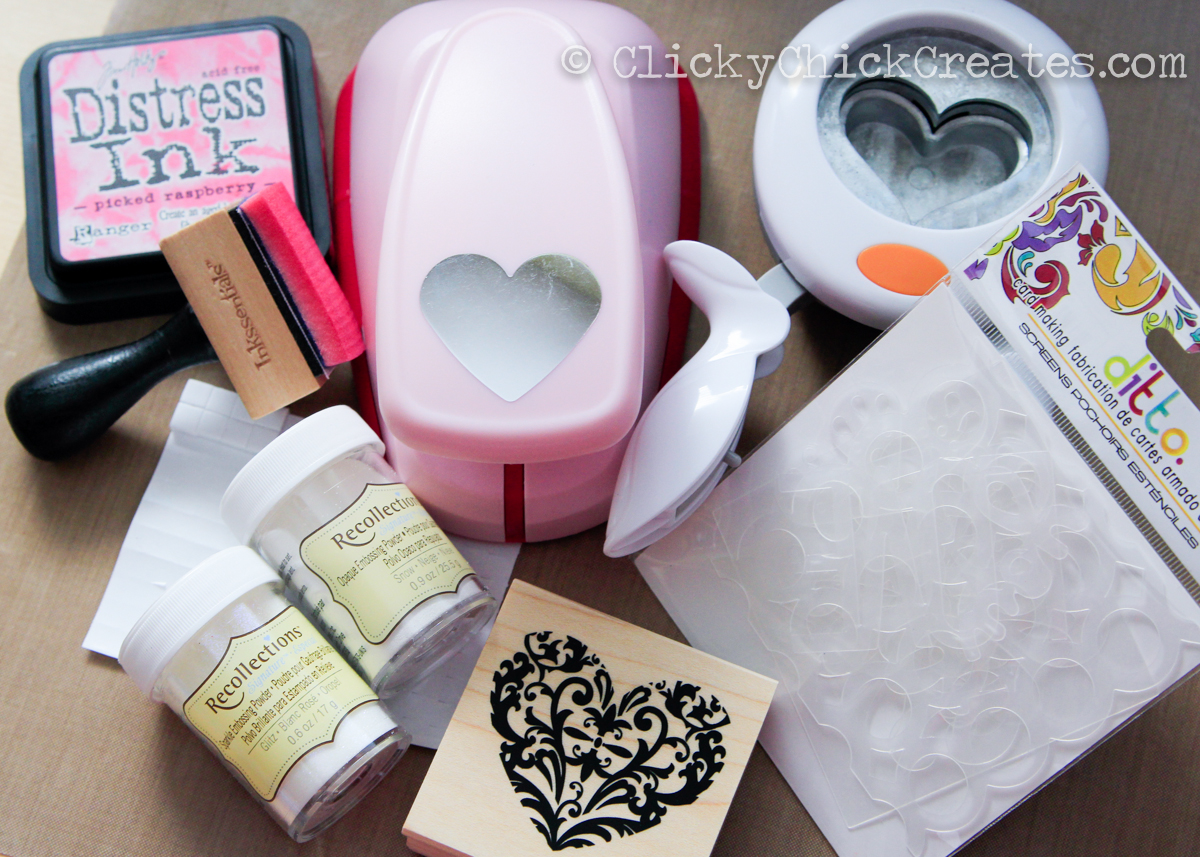
- pink Ink (Tim Holtz Distress Ink in Picked Raspberry)
- white chalk ink (VersaMagic Chalk in Cloud White)
- VersaMark Matermark Ink Pad
- Blending Tool with foam
- Embossing Powders (Glitz and Snow/white)
- Heart Stamp (Recollections)
- Happy Valentine’s Day stamp (Close to my Heart)
- Heart Punches (2 different sizes – one large, one x-large)
- Stencils
I started with an 8-1/2″ x 11″ piece of patterned cardstock, cutting it in half so I had two pieces of 8-1/2″ x 5-1/2″ pieces, which I then scored into 4-1/4″ x 5-1/2″ cards.
I punched two large hearts on pink cardstock, chalked the edges in white and added dash lines (faux stitching) in red marker.
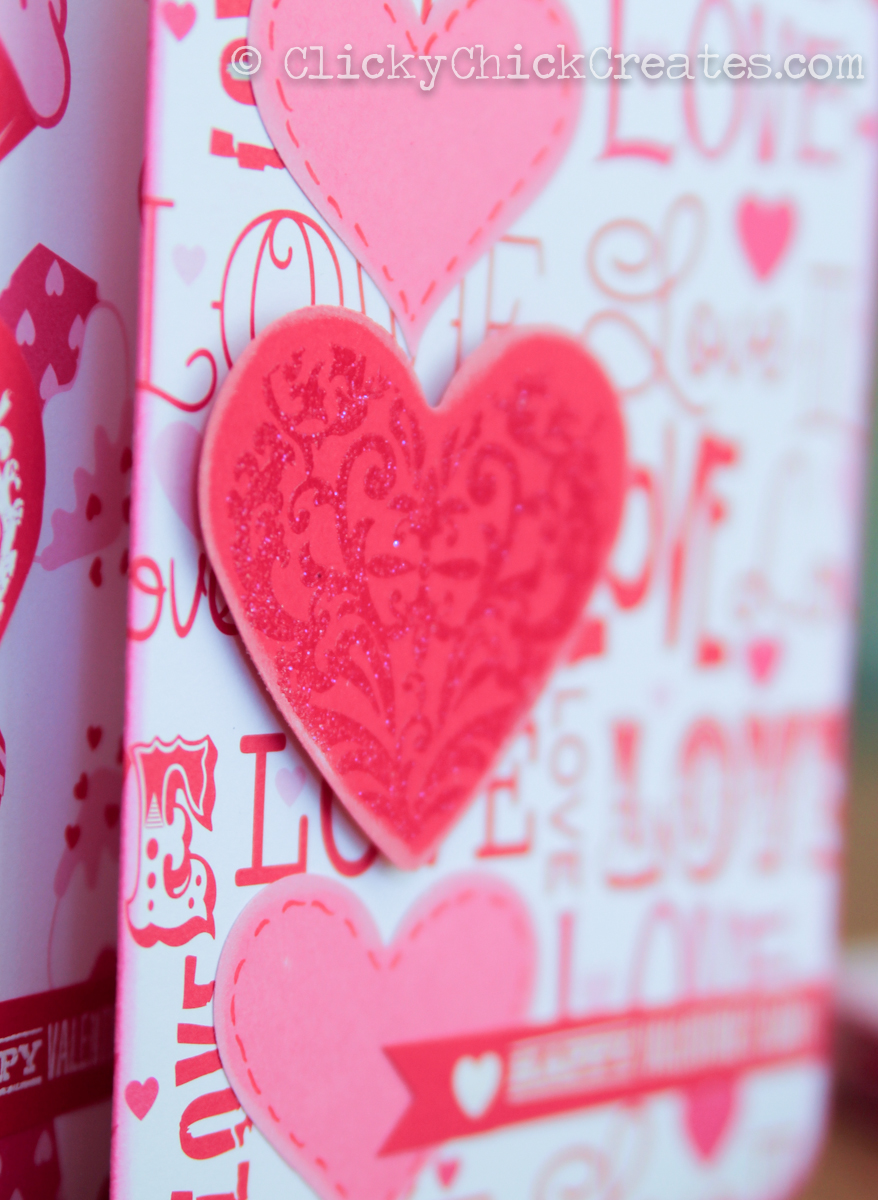
Using VersaMark and Glitz embossing powder, I embossed the brocade heart on red cardstock; then punched using the x-large heart punch, and chalked the edges in white again. Here’s a close up:
Using VersaMark and Snow (white) embossing powder, I embossed the Happy Valentine’s Day sentiment on red cardstock. I trimmed the paper to under half inch and cut out a little notch on the left side end.
Using the blending tool, I inked the edges of the entire card in picked raspberry.
Next, I glued down the pink hearts and sentiment, then added foam squares to pop the embossed heart.
I usually leave the insides of my cards blank and just hand write my message. But this time I wanted to do something different. I found the “Love” and “you” screens in my stash, and decided I’d use more of the Picked Raspberry ink. But after I did a couple, I realized I wanted to create a circle for the inking to stay within. This picture will help:

And I got that look by cutting a 3-1/2 circle and using the negative to create a border. This photo will help explain:

Clearly, holding the stencils in place with my hands meant I got a little inky today, but what’s not to love? I can’t wait to use this technique again… soon!
Thank goodness for forts! The girls kept busy and I ended up making six of these cards for our loved ones. Have I mentioned I love the way they came out?!?!

What Valentine’s crafts kept you busy? Cards? Decor? Gifts? I’d love to hear and even see, so share in the comments below!
Thanks for stopping by and have a joyful, creative, blessing filled day!
Happy crafting!
xoxo,
/c

9 responses to “Valentine’s Cards {Feeling Crafty}”
[…] ← Feeling Crafty: Valentine’s Cards […]
LikeLike
Very Pretty Cards love all the pink!
LikeLike
Thanks Beth! We’re a very pink household : )
LikeLike
very cute!
LikeLike
What FUN! I’m glad you had success in getting your cards out. My valentine’s cards are ready to go, but are doomed to be late. I love the fort idea! Great blog, Connie!
LikeLike
Thanks for your kind words! Hope your cards made it out. I’m sure your loved ones will appreciate them, late or not!
LikeLike
What FUN! I’m glad you had success in getting your cards out. My valentine’s cards are ready to go, but are doomed to be late. I love the fort idea! Great blog, Connie!
LikeLike
Love your post today. Your cards turned out so cute and love, love, love the photography. 🙂 Thanks for sharing and hope you guys are all feeling better soon.
LikeLike
Thanks Danni! Just so happy I could get them out before it was too late 🙂 And we’re all much better today. Sometimes we just need a stay-home, in-our-jams, restful kinda day! PS. Did you catch last weeks post? https://clickychickcreates.com/2013/02/07/can-a-picture-really-be-worth-a-1000-words/
LikeLike